This time i used a combination of red food colouring, white paint, glitter and glitter glue. The glitter when mixed with the paint water made some awesome effects as the glitter and liquid were shot into the tank. As the solution entered the tank the light reflected off the glitter making it sparkle which looked awesome.
Tuesday 16 April 2013
Organic Effects: Different Colours
This time i used a combination of red food colouring, white paint, glitter and glitter glue. The glitter when mixed with the paint water made some awesome effects as the glitter and liquid were shot into the tank. As the solution entered the tank the light reflected off the glitter making it sparkle which looked awesome.
Organic Effects: More experiments
I edited the colours again and flipped some of the clips to see if it looked more alien in a different way.
First Attempt: Organic Visual Effects.
Above is the end result of my first attempt at re creating some of these organic effects. There are more details in the description on YouTube. but essentially:
1. Boil 200 ml of salt in water for 20 minutes. Repeat for stronger concentrations.
1. Boil 200 ml of salt in water for 20 minutes. Repeat for stronger concentrations.
2. Clean tank, blemishes can show up in the film
3. Collect items, food colouring, cornflower, paint, pipets (for shooting into the tank)
4. Fill the tank with as much salt water as you want
5. Push in a bin bag and then slowly add fresh water
6. Remove the bin bag VEEEEEEERY carefully and if done right you can see the different layers of fresh and salt water.
The results were really good for a first attempt and I edited the colours in places they weren't as vibrant.
Next time im going to change the salt water concentration to see if this changes the outcome.
Friday 8 March 2013
More After Effects.
Now it was time to edit the green screen footage of jeff getting abducted. This involved using a process called keying. I blogged about this earlier in the project when we were taught it but I still wanted to document the progress of my own keying. Im getting the hang of keying and quite enjoying the process and generally using after effects.
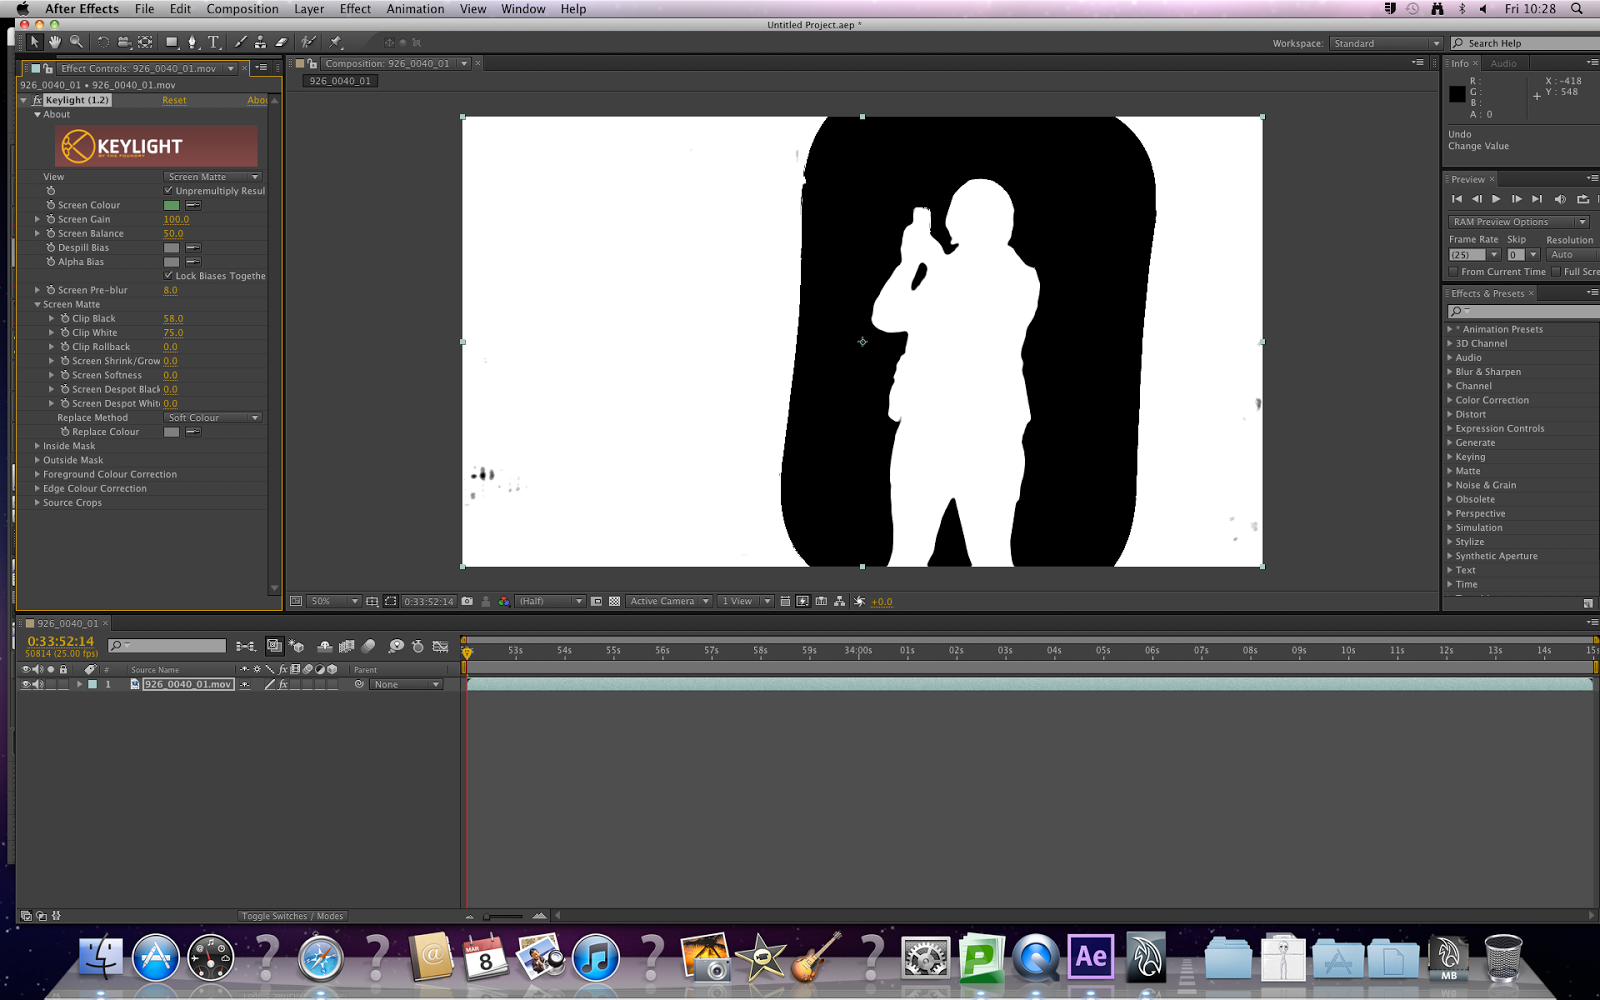 |
| The less grey the better. |
 |
| Actor separated from background. |
 |
| Dissolved. |
Using the scatter effect I gave the impression of the actor being disolved by the alien spaceship and abducted into it. I keyed the action in the timeline then added the effect. I then made another key which changed the opacity to 0, so from the first to the second key it looks like she's been vaporised. I also changed the scatter to vertical so it looked like she was being beamed up.
I really enjoyed doing this in AE and im finding it easier to pick up than I did initially with Maya. The program is also a lot less complex than Maya in the sense that working with 2d images is easier and less can go wrong.
Thursday 7 March 2013
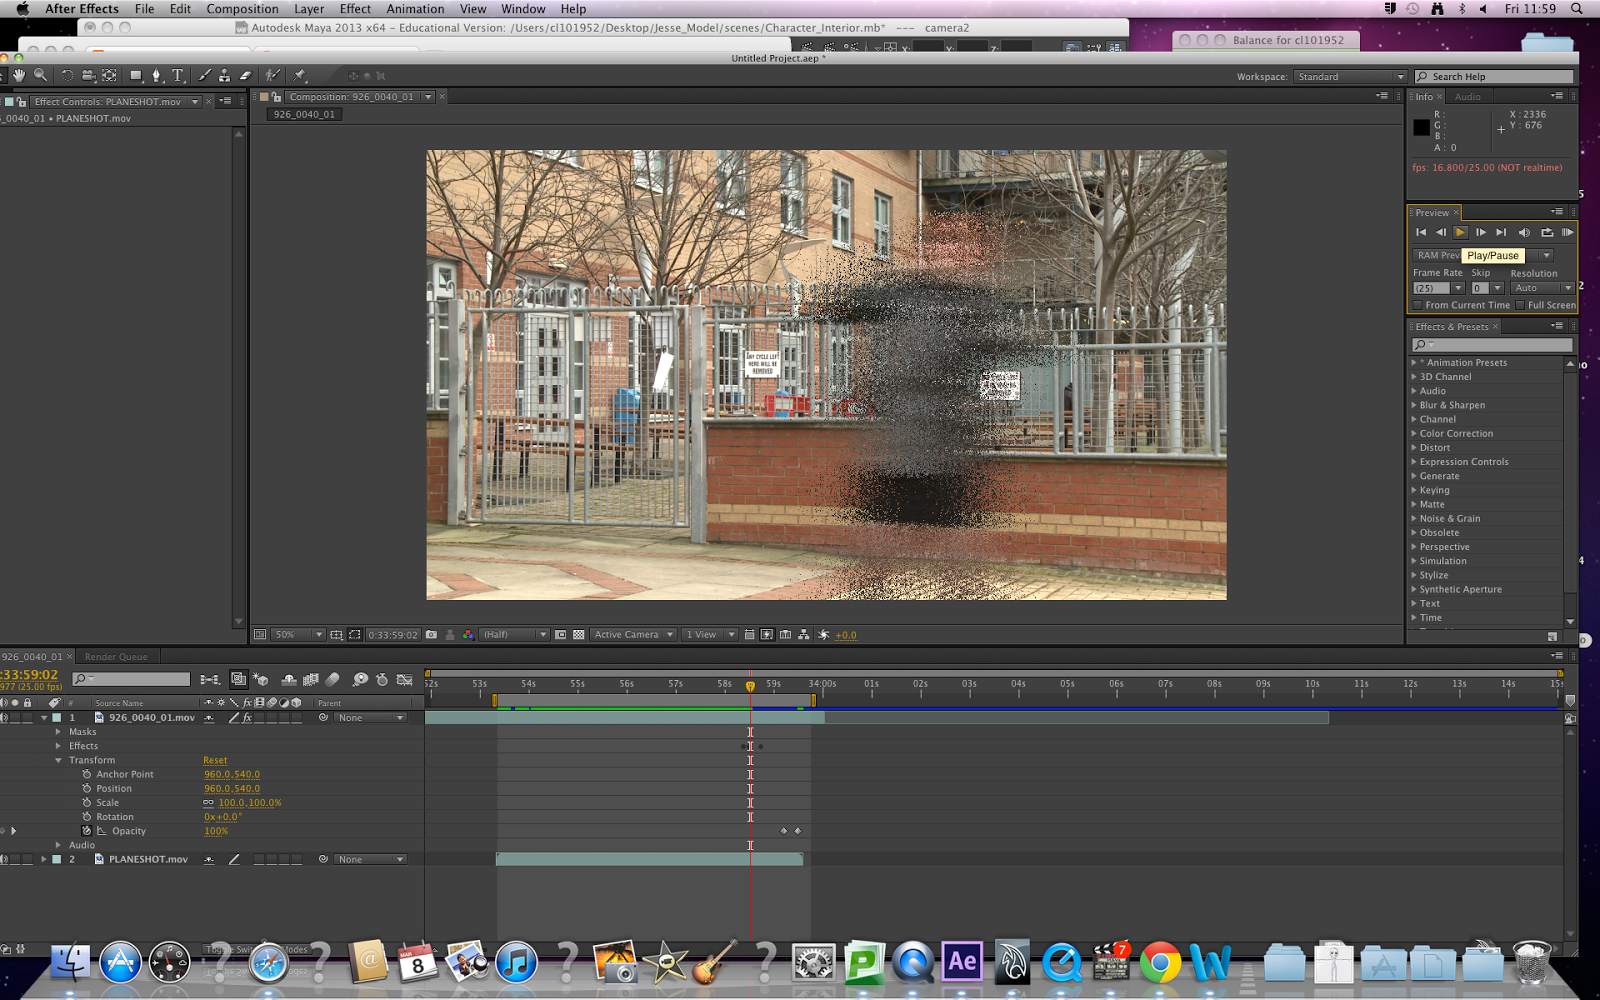
Spaceship animation and AE.
After finishing with the model I moved on to animating the spaceship. I Imported an image file into the maya and animated the spaceship flying in front of it to reference where it would fly in the video file.

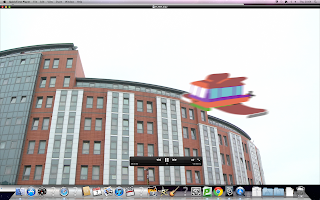
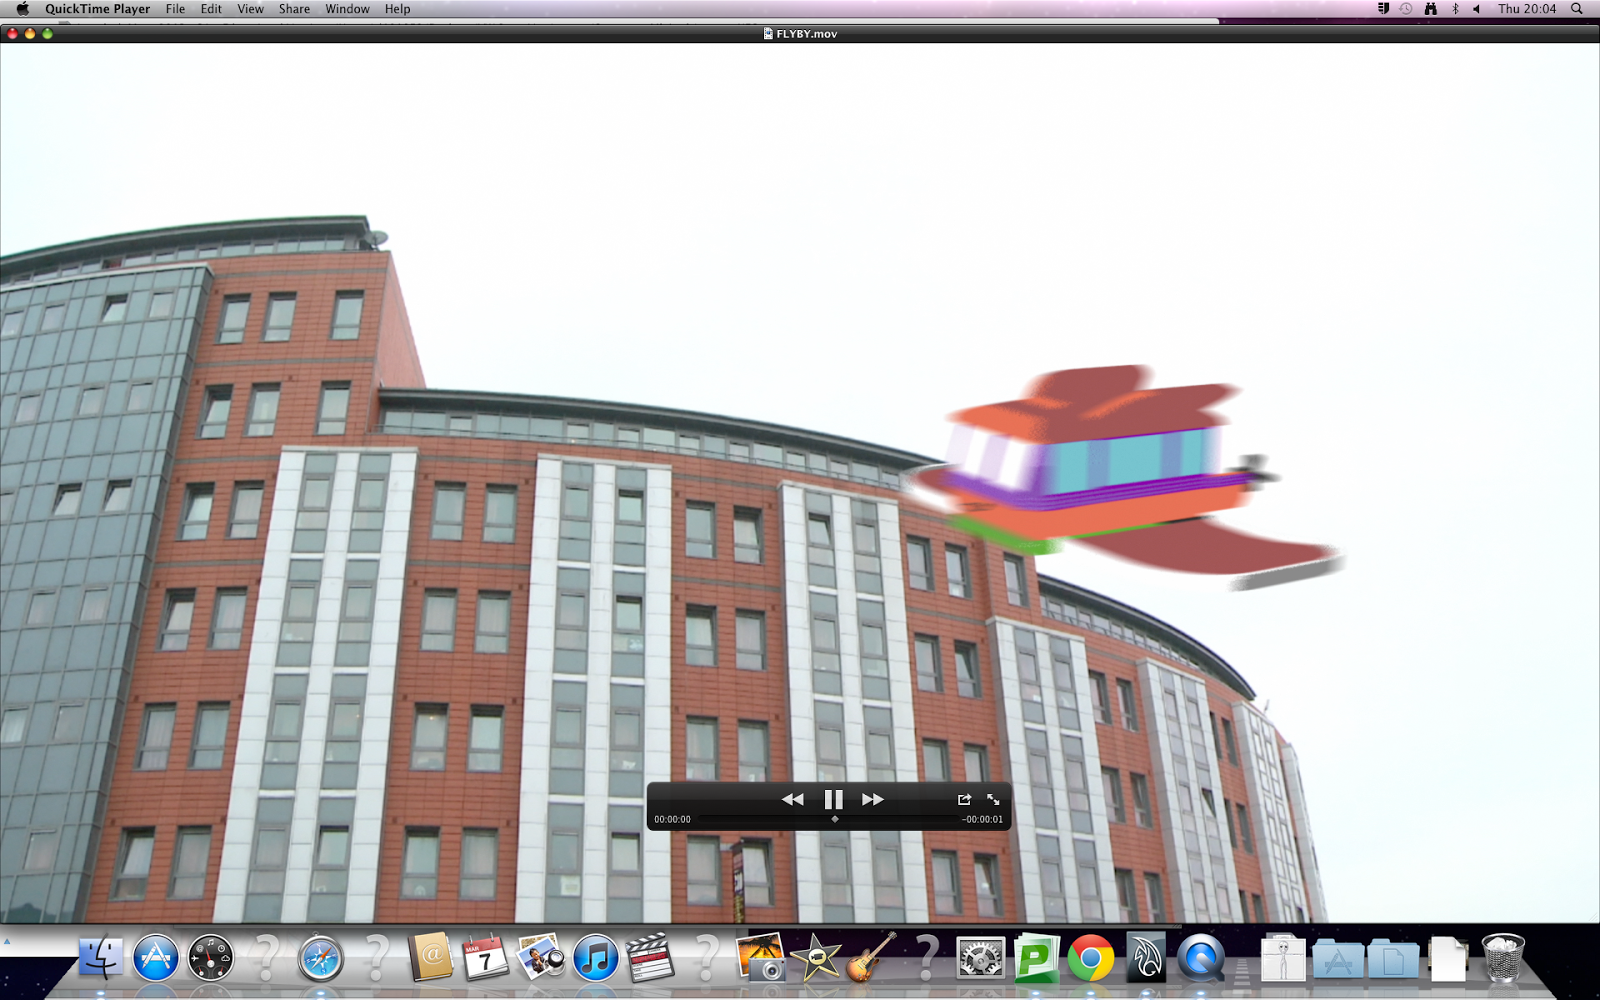
I also added a motion blur to simulate the flying effect in a better way and help blend the spaceship and background. This is not a finished product but this is the current state.
Rigging & Binding.

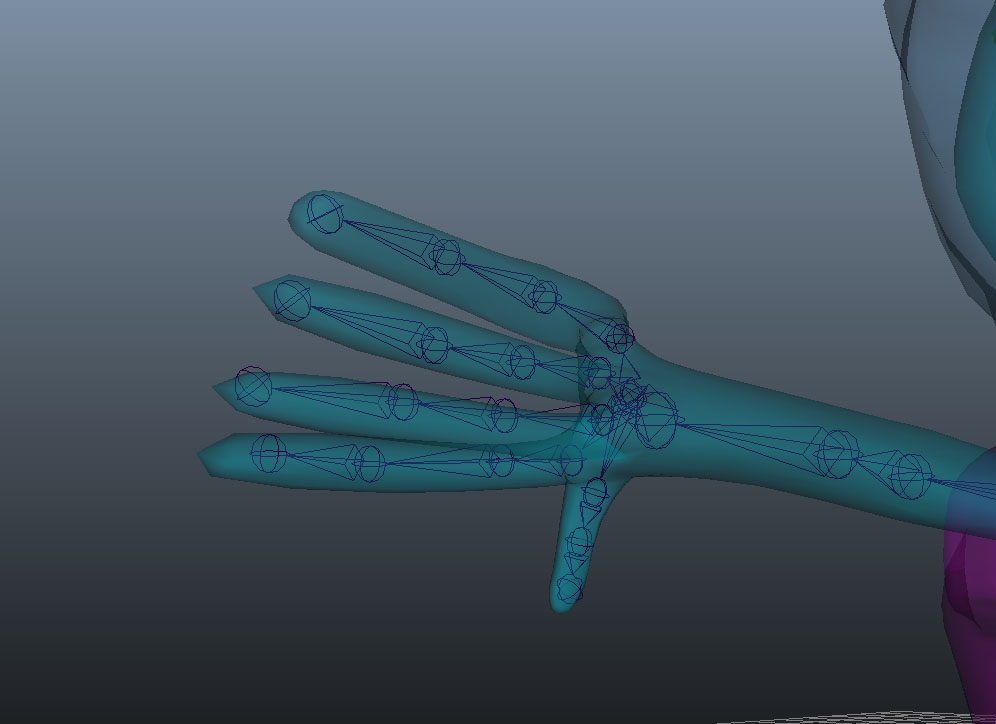
The next stage was to create the controls for the rig. This meant using NURBS primitives to draw out appropriately shaped handles which would then serve to operate the joints inside the mesh. Circles were used for first two spine joints, neck, head, elbows and feet. Where as the jaw, hands, shoulders, third spine joint, and clavicle controls were drawn out to mimic the rough shape of the body part in question. Except for the third spine joint and the clavicles they were controlled by arrows which showed their direction of movement.
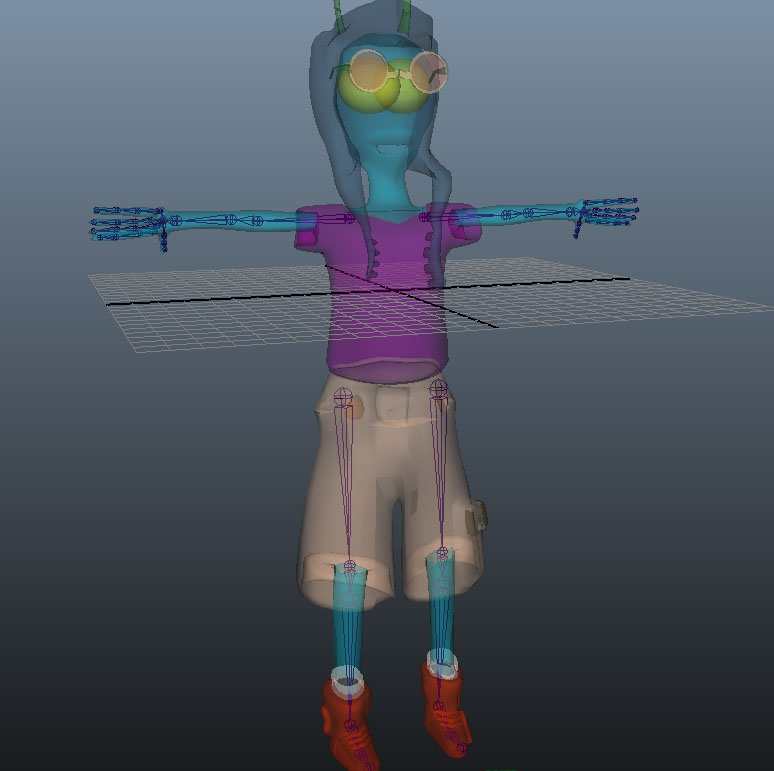
After creating the controls I had to then constrain them to each relevant part so the controls move the skeleton with it. This was all very complicated but I struggled through and then it was time for parenting. This involved parenting each joint to the appropriate one next in the hierarchy this involved thinking of how the human body was constructed.
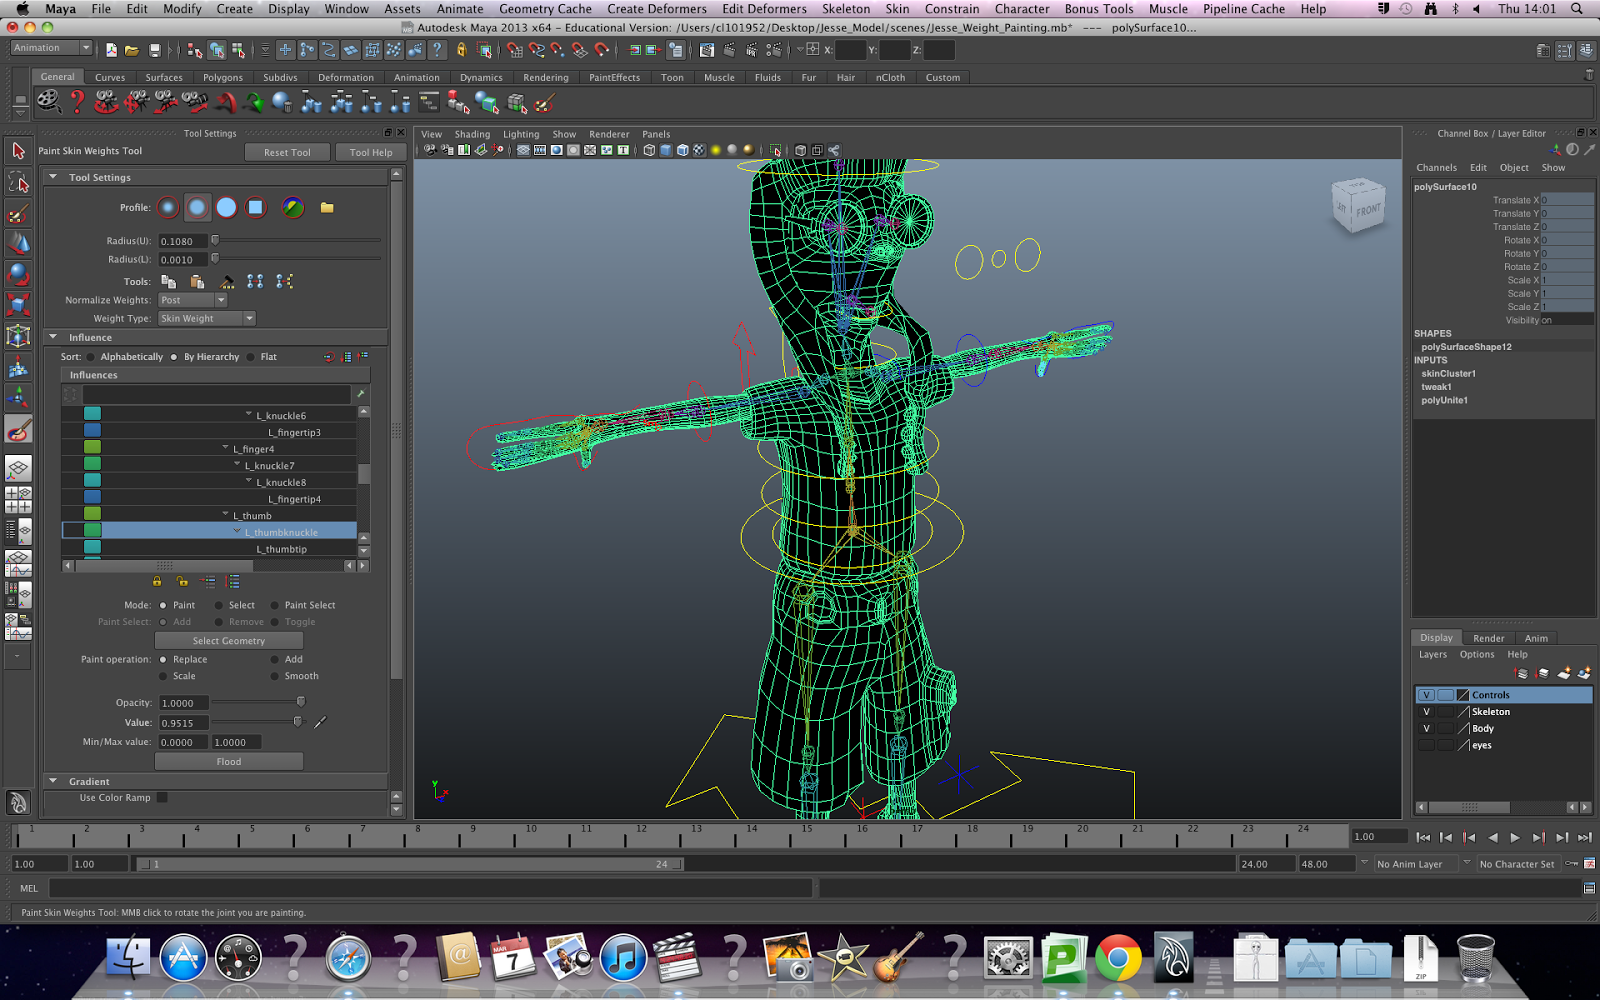
Weight painting was the next task which was found to be increasingly difficult this resulted in me not weight painting the model extensively just the key parts this resulted in less animation than i had intended. This was necessary as I was tight on time. I simplified the movements to just a wave and a turn of the head. However throughtout this module i do believe my skills in all these areas have improved as most of the things I've talked about i couldn't do before. Besides weight painting which I really need to work on.
Monday 4 March 2013
Interior.
Now considering that this is the back of a camper van the interior should be as such so I pulled some images off the internet to give me an idea of what to include.
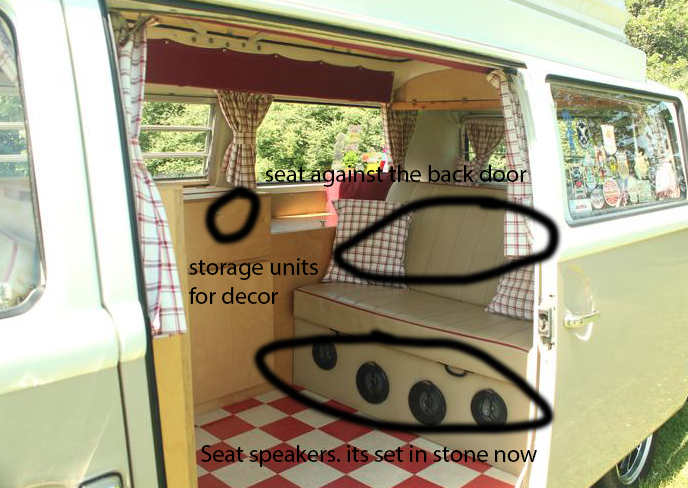
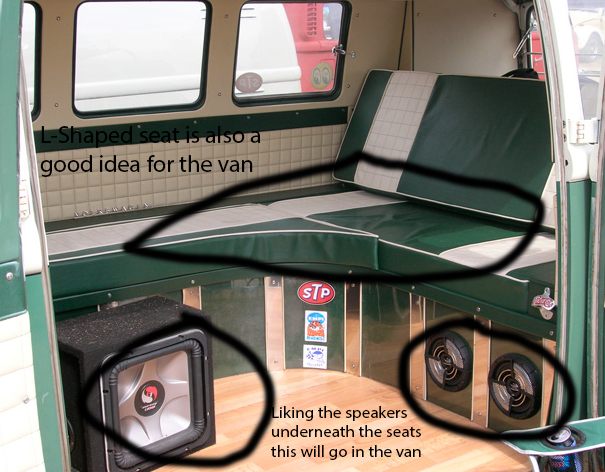

I liked the patterns on the blue one because they are really vibrant and complicated. This I thought was ideal and the design of the chair was also what I was looking for.
After using the pictures I had acquired I started to build and shade the environment based on the images shown above.
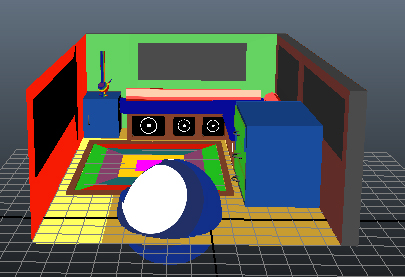 |
| the colours could be considered a little ostentatious but thats the idea. Normal hippies are a bit funky so what are space ones going to be like. |
 |
| the speakers were a key part of the design. the space hippies have to mirror real hippies as much as they can to make them believable |
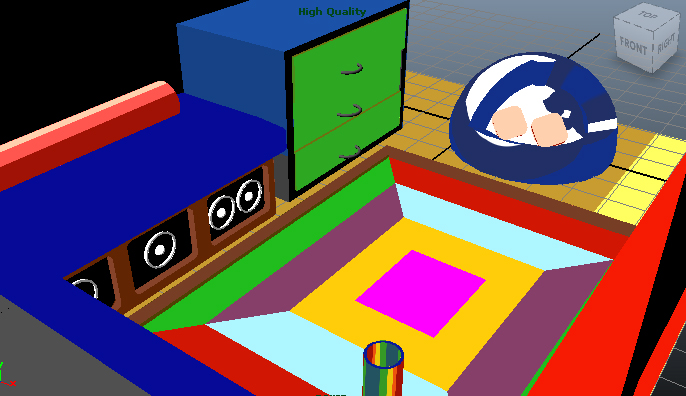 |
| using a toon shader for the environment was a really good idea because when the light hits the surfaces the change colour depending on your perspective. Another example of ultra-hipping. |
Subscribe to:
Posts (Atom)